Unfortunately, this news update does not pertain to the everyday highlights of the political race for presidency, or the latest scandals of the celebrity realm. Rather, I want to update you, the reader, about some recent blog development that has occurred behind the scenes.
Recently, this blog exchanged links with the duct tape/vacuum cleaner forums on the Best Friends Network. You can check this out on the link on the left side of the blog. In addition, this blog has two other exchange queries in progress.
This means, The Weekly Duct Tape Project is rapidly expanding through acquaintances. These links will bring in a healthy, supple influx of new visitors. It will get this blog, and its highly unique, one-of-a-kind art out there for others to enjoy.
In the near future, two new, exciting projects are on their way. We will be making 2D football helmets so you can support your favorite team, and awesome duct tape ties, so you can show off your skill and art at work! We have a ton of new, exciting things on the way, so you won't want to miss out!
Thursday, January 31, 2008
Tuesday, January 29, 2008
Valentine's Day Flower
People say duct tape is extremely versatile, and can fix or make just about everything, but did you know, it even works for valentine's day too? Duct tape and romance you ask? Absolutely! In this lesson we will be making a simple flower which will make you amazingly unique on this day of valentine!


Using our trusty Hershey's chocolate kiss, we need to trace 10 circles on a regular sheet of paper using a pencil. (the must be in 2 lines with 5 circles each) However, any circle object will work. A quarter, or quarter sized coin will do the job! Be sure to draw them somewhat close together, like my picture illustrates.

Now, let's cut the rows of circles out. Remember, two rows of five! The picture illustrates the importance of the two rows. (one for each strip of tape) Now, using scrap tape, securely fasten the rows of circles to the strips of tape. These circles will serve as a template for the pedals for our flowers. Be sure to leave room for one last, small circle which we will cut out later in the lesson!

Using our amazingly handy razor knife, (be careful when using) cut along the lines of our circles, then pull the excess tape off. The circles should separate easily, and it should look like the picture below.

Now we are ready to place our pedals. I prefer to make a mark in the center of my piece to give myself a guideline for the center.
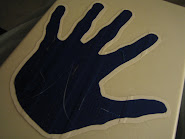
This part is a little tricky. Cemetery is important! So, lay your circles out, upside down. (sticky side up) This will enable us to easily move them around until they appear centered. Now, one by one, turn them over and place them (sticky side down) on the black duct tape. Use the pattern in the picture below. It is necessary to space these white circles apart because they will form our outer pedals.

Now we must place out inner pedals. Using the same procedure, place the purple circles. This time, place them closer to the center. Their edges should overlap. Refer to the picture below to give yourself a guideline. (This placement is somewhat difficult, so give yourself a pat on the back, even if you are having trouble!)

Now, using our strip of yellow tape, we need to cut the pollinated center of our flower. Use one of our spare cut outs from the pedals as a guideline for the circle.

Next, we must produce some miniature pedals. Using the picture below as a guideline, make several cuts, as illustrated by the black marker line, around the circumference of your circle.

Lastly, we will make the very center of our flower. We need a smaller circle, so I used the cap of a marker. (a red marker, as you can see.) Anything will suffice, but it must be significantly smaller than the pedal circles.

Now, just cut it out.

Place the yellow, fringed circle in the center of the pedals, then place the small white circle in the center of the yellow circle. (Somewhat confusing instructions... Just look at the picture below. A picture is worth a thousand words right?)

Last, but not least, we must finish my trimming the excess black tape. With the knife, trace around the pedals, leaving a slight border or black tape. (I left about 1 millimeter of black) This dark border will emphasize the lively color of our piece.
First, we need to lay our foundation for the project. As seen below, we need to lay 5 stretches of duct tape to be cut. We need to unroll and lay:
- 2x, 4 inch long pieces of black duct tape (overlap them slightly, they will be our main foundation for the flower)
- 1x, 6.5 inch long strip of white duct tape
- 1x, 6 inch long strip of purple duct tape
- 1x, 2 inch long strip of yellow duct tape (not shown)
Using our trusty Hershey's chocolate kiss, we need to trace 10 circles on a regular sheet of paper using a pencil. (the must be in 2 lines with 5 circles each) However, any circle object will work. A quarter, or quarter sized coin will do the job! Be sure to draw them somewhat close together, like my picture illustrates.
Now, let's cut the rows of circles out. Remember, two rows of five! The picture illustrates the importance of the two rows. (one for each strip of tape) Now, using scrap tape, securely fasten the rows of circles to the strips of tape. These circles will serve as a template for the pedals for our flowers. Be sure to leave room for one last, small circle which we will cut out later in the lesson!
Using our amazingly handy razor knife, (be careful when using) cut along the lines of our circles, then pull the excess tape off. The circles should separate easily, and it should look like the picture below.
Now we are ready to place our pedals. I prefer to make a mark in the center of my piece to give myself a guideline for the center.
This part is a little tricky. Cemetery is important! So, lay your circles out, upside down. (sticky side up) This will enable us to easily move them around until they appear centered. Now, one by one, turn them over and place them (sticky side down) on the black duct tape. Use the pattern in the picture below. It is necessary to space these white circles apart because they will form our outer pedals.
Now we must place out inner pedals. Using the same procedure, place the purple circles. This time, place them closer to the center. Their edges should overlap. Refer to the picture below to give yourself a guideline. (This placement is somewhat difficult, so give yourself a pat on the back, even if you are having trouble!)
Now, using our strip of yellow tape, we need to cut the pollinated center of our flower. Use one of our spare cut outs from the pedals as a guideline for the circle.
Next, we must produce some miniature pedals. Using the picture below as a guideline, make several cuts, as illustrated by the black marker line, around the circumference of your circle.
Lastly, we will make the very center of our flower. We need a smaller circle, so I used the cap of a marker. (a red marker, as you can see.) Anything will suffice, but it must be significantly smaller than the pedal circles.
Now, just cut it out.
Place the yellow, fringed circle in the center of the pedals, then place the small white circle in the center of the yellow circle. (Somewhat confusing instructions... Just look at the picture below. A picture is worth a thousand words right?)
Last, but not least, we must finish my trimming the excess black tape. With the knife, trace around the pedals, leaving a slight border or black tape. (I left about 1 millimeter of black) This dark border will emphasize the lively color of our piece.

When you finish, it should look like this!

Now that you made your flower, enjoy it for a while, then give it to someone! Show someone how much you care about them this valentines day!
Happy Valentines day!
Monday, January 28, 2008
How To Make Money From Your Duct Tape Art
People love duct tape products. They can not get enough of them! Now that we are duct tape artists, why shouldn't we take advantage of this momentous demand? I sure can't think of a reason. You can turn your projects into cash for yourself and more duct tape for more projects!
Did you notice something in the previous sentence? By selling your duct tape projects, you will get money to refill your supply of duct tape and you will end up with extra, personal money.
In a sense, you will be creating a loop which gives more money than it takes. After a short period of time, the loop will significantly grow, giving more demand, more duct tape, and more profit!
So, I formulated a few easy steps to implement to start turning the projects we don't need into money.
- Advertise! Make a few small products and give them to people you trust. Tell them, "Here, take this for free, but tell people about what I am doing."
- Use your own products. (Use the duct tape folder at school or work) Others will surely see your art and ask about it. Self advertising if you will.
- Calculate your material expenses. I use this formula to calculate how much money, in the form of duct tape, I spent in a project. [~~Cost of duct tape (including tax)~~ divided ~~by the length of tape~~ times ~~the total length of tape used.~~ ]
- Then add what you think you should earn from that particular project.
- Then repeat and in no time you will have a duct tape business!
Keep in mind, always do your best work because potential customers will see your work after you sell your art.
Project: Duct Tape Folder continued.
Welcome back! In this lesson we will be adding some minor details to our duct tape folder. These details will readily bring out the beautiful, intricate nature of the folder!
Remember those leaves we cut out from the drawing? We will need those once again. (It is safe to say, with a duct tape project, don't throw anything away until you are completely finished) We must lay a piece of green duct tape down on our cutting board, then fasten the paper leaf on top of the tape using scrap tape.
Using the technique we learned when we applied a glare to out musical note, we must create green reflections to place upon our leaf. Below, you can see how I applied the tape to the cutting board, attached a leaf, then cut out the reflection. (Remember, all of the reflections must look like their light is coming from one place! For example, light can't be on top of one leaf, then on the bottom of another and the reflection must be significantly smaller than the leaf.)
 When we have all of our reflections cut out, we must carefully apply them to our folder's main design. The picture below illustrates my placement, but here, variation can look good, so experiment and find what you like!

After I starred at my folder for an awkward five minutes, I decided it needed something more. After another five minutes I concluded the sprout could be placed over a large sphere, with a smaller sphere above it. The large sphere represents the earth, while the small sphere represents the sun. We are getting really artsy now eh? The pictures below illustrate the spheres I placed.
Remember those leaves we cut out from the drawing? We will need those once again. (It is safe to say, with a duct tape project, don't throw anything away until you are completely finished) We must lay a piece of green duct tape down on our cutting board, then fasten the paper leaf on top of the tape using scrap tape.
Using the technique we learned when we applied a glare to out musical note, we must create green reflections to place upon our leaf. Below, you can see how I applied the tape to the cutting board, attached a leaf, then cut out the reflection. (Remember, all of the reflections must look like their light is coming from one place! For example, light can't be on top of one leaf, then on the bottom of another and the reflection must be significantly smaller than the leaf.)
 When we have all of our reflections cut out, we must carefully apply them to our folder's main design. The picture below illustrates my placement, but here, variation can look good, so experiment and find what you like!
After I starred at my folder for an awkward five minutes, I decided it needed something more. After another five minutes I concluded the sprout could be placed over a large sphere, with a smaller sphere above it. The large sphere represents the earth, while the small sphere represents the sun. We are getting really artsy now eh? The pictures below illustrate the spheres I placed.


Spheres, by nature are incredibly difficult to cut by hand. In this instance, I used a small jar and a Hershey's kiss to cut the spheres. Just trace around them like we all did in kindergarten! (Common household items come in handy)
When it all comes together, Our project should look like this! Magnificent no?
This method can be implemented to decorate anything! So, just keep practicing and you will be a pro in no time! Be sure to stay tuned in for our next lesson!
Sunday, January 27, 2008
Project: Duct Tape Folder
In this lesson, we will be transforming a regular folder (as seen below) and inscribing it with artistic duct tape taste...


To start spicing up our folder, we will need to completely cover the outer faces of our folder in black duct tape. The pictures below will illustrate how to neatly reface our folder.


When we are finished, it will look something like this... (yes it is completely duct tape! Amazing what it can do eh?) Feel free to draw and use your own design for this project! Creativity is critical!
To start spicing up our folder, we will need to completely cover the outer faces of our folder in black duct tape. The pictures below will illustrate how to neatly reface our folder.
In the picture below, you can see how I measure my strips. I unroll some tape, then turn it backwards so it does not stick, then I compare it to the length of the folder and make adjustments. Keep in mind, duct tape is fairly expensive so don't significantly exceed the folders length.
On the corners of the folder, we end up with an excess of duct tape. Unlike the edges, we can not neatly fold it over. These edges can be seen in the picture below.
To remedy these edges, we need to take our razor blade and trim the edges to create a clean, professional looking corner. The picture below depicts the method we will use to clean our corners up.
After we have our folder completely covered, we need to cut out our main design. In this step, we need to lay out a patch of duct tape. (like we did for the folder) This patch has to be slightly larger than the design on our paper. Now we will fasten our paper to our cutting board using tape. Be sure to check every side to ensure adequate room. (it is severely annoying when you realize you have to fix something when you are half way through the project) Then cut along the lines. It should begin to look like the pictures below.

Once we have all of the pieces cut, we must separate them on our cutting board in order to prepare them for placement.

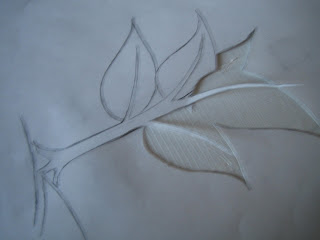
In order keep our design centered and straight, we must place the most central part of it first. In this instance, it is the stem of our plant. Once we feel it is adequately centered, we will proceed to placing the leaves. It should look like the picture below.

When all of the pieces are placed, it should look like the picture below. If you will notice, in the top of my sprout/tree, you will see my mistake. In the original drawing, I didn't draw space in between the leaves and the stem. After i placed to leaves in this manner, (see below) I realized the top of the design needed to be altered in order to achieve a complete look.

In order to rectify my discrepancy, I duplicated one of my cut out leaves, then produced an add on stem to make it fit together. The solution can be seen in the picture below.

After the main design is complete, we must add some supplementing touches. For this piece, white, vertical borders produce a magnificent accent. In order to create these, take a full piece of duct tape, and in the method we utilized to cover our folder in black, measure a piece of white tape. Then, place half of it on the side of the folder, and like a hot dog bun, fold it over to the other side. when it is finished, it should look like the picture below. (also, we need to trim the edges in the manner we used above.)


When it is finished, it should look like this! In the next lesson we will add the green shading effects. Congratulations! You just finished your first major duct tape project! Now you can see how versatile and magnificent duct tape really is! I hope you enjoyed today's lesson!
If you have any comments, please don't be shy, i would love to hear them!
Friday, January 25, 2008
Realistic 2D shading
Welcome to our second lesson! In our previous session, we created a solid black eighth note from standard musical notation. In this lesson we will be adding some realistic shading accents to bring the design to life. (believe me, it makes a huge difference! Scroll down to see the final result!)
In this lesson we will need:


In this lesson we will need:
- A small amount of white duct tape (2-4 square inches)
- Our trusty razor knife (Sharpness seeks flesh! be careful!)
- Cutting board
- Our original black eighth note
- The paper template of the eighth note (we made this last lesson but another can easily be recreated if you threw it away!)
I think that covers our supplies. In this section, a bit of a visualistic eye is required, but don't worry, its not hard at all, and the results are amazing, trust me!
First, we need to place our paper template on top of our white duct tape. We are doing this because it will give us an idea about where to make cuts. However, we will need to estimate where our glare or reflections will need to be placed. This is where our visualistic touch comes in.
First, lets place glare on the fat part of our note. So, lay the fat part of the paper template on the white duct tape and cut out a shape which resembles a kidney bean. It should look something like this. (The picture can be somewhat deceiving. For clarity's sake, the cut I made went through the paper and duct tape)
Now, save this piece. We will place it on the note later. Now, we need to create some small glare for the top, swish part of the note.
So, remove your paper template and recenter the swish tail on a clean, unused section of the white duct tape. Here, all we have to do is cut out a significantly smaller version of the swish. It should look like this.
Now, we must place our pieces of glare. In order to give the duct tape note a realistic appearance, we need to take light's nature into account. Generally, light only shines from one source and glare is a result of that emission. This can be seen in the picture below. When we place our glare, we need to place it on the same side of the design. This practice can be best explained by looking at the picture below. You will see that both of the glares are on top of the note. (the light imaginary light is coming from above in this case.)
Congratulations! You now know how to add realistic shading to your duct tape art! Now you can make amazing, eye-snatching duct tape creations! See? I told you it wasn't too hard. It only takes practice! Feel free to try a few of your own ideas out! Please feel free to comment on my tutorials or even share your own ideas!
Be sure to join us for our next lesson! See you soon!
Thursday, January 24, 2008
Our First Lesson: Basic 2D Design Fabrication
Welcome to our first project! In this lesson, I will teach you how to fabricate simple, sharp looking 2D items and designs!
This lesson will cover a fundamental, imperative skill which is and will be the basis for all future duct tape projects. Don't let that scare you though! Its easy, fun, and it yields amazing results which will have your friends asking for more!
For this lesson, I have selected to guide you through the process of creating an eighth note, from standard musical notation. It is easy to create and it will look great! Although, feel free to substitute your own design or colors! The process is the same for all projects!
~~~~~~~~~~~~~~~~~~~~~~~~~~~~~~~~~~~~~~~~~~~~~~~~~~~~~~~~~~
Supplies/tools needed:

Next, we will draw the general shape of our design. Regular paper does the job. (but cardboard could be useful if you plan on making numerous copies of your design.) Its absolutely fine if you are uncertain about your drawing ability! This is just an outline to cut around.

Then, we will cut our design out. The straight blades of the scissors will naturally remove any curves in the drawing. (where they need to be removed) Be sure to round the fat part of the note with your cuts.

When we have the cut-out design ready, we will center it on the duct tape strip, and fasten it with a piece of tape. (kinda funny right?) In this instance, I prefer scotch tape because it can easily be removed.

Now, we will complete the most important step, cutting the duct tape. Be EXTREMELY careful when cutting. Razors will remove a finger without thinking twice! Believe me, its happened and it wasn't pretty.
In the picture below, you will see I removed the excess duct tape in sections. I favor cutting out in sections because it allows me to see my progress, it makes the piece look more pleasing, and it makes this step easier.
When it is finished, it should look like this! If it doesn't, just keep practicing. If it was easy, everyone would be doing it right? You will get it soon enough!

This lesson will cover a fundamental, imperative skill which is and will be the basis for all future duct tape projects. Don't let that scare you though! Its easy, fun, and it yields amazing results which will have your friends asking for more!
For this lesson, I have selected to guide you through the process of creating an eighth note, from standard musical notation. It is easy to create and it will look great! Although, feel free to substitute your own design or colors! The process is the same for all projects!
~~~~~~~~~~~~~~~~~~~~~~~~~~~~~~~~~~~~~~~~~~~~~~~~~~~~~~~~~~
Supplies/tools needed:
- Duct Tape (approximately 6 inches)
- Cutting Board
- Scissors (be careful, gloves aren't a bad idea here either.)
- Regular paper (no particular kind)
- Razor knife. (very sharp! I advocate wearing protective gloves when cutting.)
- Scotch Tape (approximately 1 inch)
Disclaimer: Some of the tools are dangerous! Take great care when using them. If injury should occur, I accept no responsibility. I am not responsible for anything. By reading any part of this blog, you agree to this disclaimer, whether you have read it or not. It is your responsibility to read this. But, just be careful! In fact, wear gloves when cutting.
~~~~~~~~~~~~~~~~~~~~~~~~~~~~~~~~~~~~~~~~~~~~~~~~~~~~~~~~~~
To begin, we will need duct tape and a cutting board as shown in the picture below.Next, we will draw the general shape of our design. Regular paper does the job. (but cardboard could be useful if you plan on making numerous copies of your design.) Its absolutely fine if you are uncertain about your drawing ability! This is just an outline to cut around.
Then, we will cut our design out. The straight blades of the scissors will naturally remove any curves in the drawing. (where they need to be removed) Be sure to round the fat part of the note with your cuts.
When we have the cut-out design ready, we will center it on the duct tape strip, and fasten it with a piece of tape. (kinda funny right?) In this instance, I prefer scotch tape because it can easily be removed.
Now, we will complete the most important step, cutting the duct tape. Be EXTREMELY careful when cutting. Razors will remove a finger without thinking twice! Believe me, its happened and it wasn't pretty.
In the picture below, you will see I removed the excess duct tape in sections. I favor cutting out in sections because it allows me to see my progress, it makes the piece look more pleasing, and it makes this step easier.
When it is finished, it should look like this! If it doesn't, just keep practicing. If it was easy, everyone would be doing it right? You will get it soon enough!
Congratulations! You made it through my first lesson!
Be sure to keep your note or design for our next lesson, we will make it look even better!
Wednesday, January 23, 2008
Getting Started
Within any profession, one requires tools. This is no different. A duct tape artist requires three main items. Thankfully, none of which are expensive.

- Duct tape! How can one make art if they have no paint? (duct tape in this case) Personally, I purchase my duct tape at Walmart, but if you can't get to Walmart, there are some nice deals on the Internet.
- Razor knife! These make it easy to create nice, professional looking designs. (Be careful, these are SHARP!) Home Depot sells these knives for a modest, pleasing price, but again if you don't have access to a Home Depot, check the Internet.
- A cutting board! Razor knives make gigantic scratches that will ruin any table... So, use a cutting board so you can keep your tables! Makes perfect sense eh? I prefer and advocate stone cutting boards because the duct tape can solidly adhere to the surface but can easily be removed. (The bigger, the better!) Home depot sells granite and other stones, but I'm sure you can order a square foot or two from the Internet, or just experiment with your own cutting boards!
So, go out and invest in some tools so you can join us when we start out first project!
Introduction
Hello everyone! I'm Tyrannt and before we dive into the wonderful world of duct tape I would like to tell you a bit about me.
Well, I love duct tape! But I'm sure you all have already put that together. At the moment, I am a full time student. I have been diagnosed with A.D.D. (attention deficit disorder) so I frequently change my interests. (Tennis, flipping/tricking, band, jazz band, marching band, pep band, and so on...) This blog project was birthed out of those aggressively altering interests and accordingly, so was my love for duct tape.
I am writing this blog in order to teach you, the reader, how to make beautiful, decorative art from such a practical medium. I want to share my knowledge.
I think that concludes this section. Be sure to stay tuned for when we start our lessons!
Subscribe to:
Posts (Atom)