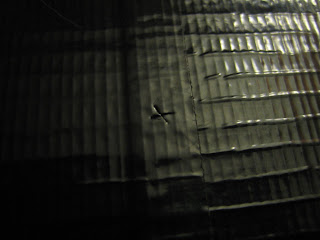
First, we need to lay our foundation for the project. As seen below, we need to lay 5 stretches of duct tape to be cut. We need to unroll and lay:
- 2x, 4 inch long pieces of black duct tape (overlap them slightly, they will be our main foundation for the flower)
- 1x, 6.5 inch long strip of white duct tape
- 1x, 6 inch long strip of purple duct tape
- 1x, 2 inch long strip of yellow duct tape (not shown)

Using our trusty Hershey's chocolate kiss, we need to trace 10 circles on a regular sheet of paper using a pencil. (the must be in 2 lines with 5 circles each) However, any circle object will work. A quarter, or quarter sized coin will do the job! Be sure to draw them somewhat close together, like my picture illustrates.

Now, let's cut the rows of circles out. Remember, two rows of five! The picture illustrates the importance of the two rows. (one for each strip of tape) Now, using scrap tape, securely fasten the rows of circles to the strips of tape. These circles will serve as a template for the pedals for our flowers. Be sure to leave room for one last, small circle which we will cut out later in the lesson!

Using our amazingly handy razor knife, (be careful when using) cut along the lines of our circles, then pull the excess tape off. The circles should separate easily, and it should look like the picture below.

Now we are ready to place our pedals. I prefer to make a mark in the center of my piece to give myself a guideline for the center.

This part is a little tricky. Cemetery is important! So, lay your circles out, upside down. (sticky side up) This will enable us to easily move them around until they appear centered. Now, one by one, turn them over and place them (sticky side down) on the black duct tape. Use the pattern in the picture below. It is necessary to space these white circles apart because they will form our outer pedals.

Now we must place out inner pedals. Using the same procedure, place the purple circles. This time, place them closer to the center. Their edges should overlap. Refer to the picture below to give yourself a guideline. (This placement is somewhat difficult, so give yourself a pat on the back, even if you are having trouble!)

Now, using our strip of yellow tape, we need to cut the pollinated center of our flower. Use one of our spare cut outs from the pedals as a guideline for the circle.

Next, we must produce some miniature pedals. Using the picture below as a guideline, make several cuts, as illustrated by the black marker line, around the circumference of your circle.

Lastly, we will make the very center of our flower. We need a smaller circle, so I used the cap of a marker. (a red marker, as you can see.) Anything will suffice, but it must be significantly smaller than the pedal circles.

Now, just cut it out.

Place the yellow, fringed circle in the center of the pedals, then place the small white circle in the center of the yellow circle. (Somewhat confusing instructions... Just look at the picture below. A picture is worth a thousand words right?)

Last, but not least, we must finish my trimming the excess black tape. With the knife, trace around the pedals, leaving a slight border or black tape. (I left about 1 millimeter of black) This dark border will emphasize the lively color of our piece.
When you finish, it should look like this!
Now that you made your flower, enjoy it for a while, then give it to someone! Show someone how much you care about them this valentines day!
Happy Valentines day!


No comments:
Post a Comment