

To start spicing up our folder, we will need to completely cover the outer faces of our folder in black duct tape. The pictures below will illustrate how to neatly reface our folder.


After we have our folder completely covered, we need to cut out our main design. In this step, we need to lay out a patch of duct tape. (like we did for the folder) This patch has to be slightly larger than the design on our paper. Now we will fasten our paper to our cutting board using tape. Be sure to check every side to ensure adequate room. (it is severely annoying when you realize you have to fix something when you are half way through the project) Then cut along the lines. It should begin to look like the pictures below.

Once we have all of the pieces cut, we must separate them on our cutting board in order to prepare them for placement.

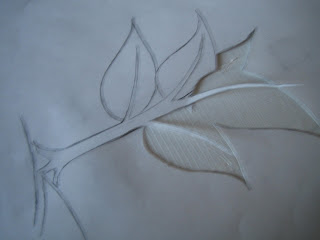
In order keep our design centered and straight, we must place the most central part of it first. In this instance, it is the stem of our plant. Once we feel it is adequately centered, we will proceed to placing the leaves. It should look like the picture below.

When all of the pieces are placed, it should look like the picture below. If you will notice, in the top of my sprout/tree, you will see my mistake. In the original drawing, I didn't draw space in between the leaves and the stem. After i placed to leaves in this manner, (see below) I realized the top of the design needed to be altered in order to achieve a complete look.

In order to rectify my discrepancy, I duplicated one of my cut out leaves, then produced an add on stem to make it fit together. The solution can be seen in the picture below.

After the main design is complete, we must add some supplementing touches. For this piece, white, vertical borders produce a magnificent accent. In order to create these, take a full piece of duct tape, and in the method we utilized to cover our folder in black, measure a piece of white tape. Then, place half of it on the side of the folder, and like a hot dog bun, fold it over to the other side. when it is finished, it should look like the picture below. (also, we need to trim the edges in the manner we used above.)


When it is finished, it should look like this! In the next lesson we will add the green shading effects. Congratulations! You just finished your first major duct tape project! Now you can see how versatile and magnificent duct tape really is! I hope you enjoyed today's lesson!
If you have any comments, please don't be shy, i would love to hear them!


No comments:
Post a Comment