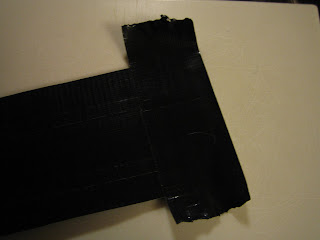
As seen in the picture above, the surface can easily be altered with a small piece of 220 grit sandpaper. The result is astonishing and simple! So, keep an eye out, this technique will be utilized in our future projects!
Join me for weekly step-by-step duct tape projects! We will begin by creating projects which teach the very basic skills, then we will use those skills to create magnificent works of duct tape art. Duct tape is new paint! Trust me, you will never think of duct tape the same way!


 However, here anything will work and long as they have the proper size ratio. So, refer to the picture below or get out there and Google, "records," to get a general feel for the sizes which are demanded by this project. (Our paper is 8 inches by 11 inches, so our largest object's diameter should be no larger than the copy paper which we are using.)
  Next, we will repeat the same procedure with our iced cream cup. Be sure to take the needed time to center the cup. Errors in centering are easily noticed.
  Again, we must repeat this process by carefully tracing around the colored pencil. Be sure to firmly hold the colored pencil because it will easily displace itself.
 Now, we must prepare our cutting board. We must meticulously cover the cutting board with strips of black duct tape which slightly overlap each other on the sides. Be sure your duct tape base is larger than the largest of the three circles which we have traced.
  Now, we must fix the copy paper, with our three circles, over the black duct tape. Be sure to tape the design down to prevent movement while cutting.
  Now, with our trusty razor knife, we must CAREFULLY cut the largest and smallest circles. For now, we must not cut the middle circle. (Be sure to keep the circles. Throwing them away now would be bad.) Our finished product should look like the picture below.
 Remember when I said save those circles? Well now, we will need our middle circle. We must lay a red foundation which is slightly larger than the middle circle. Next, we must fix the circles over the red tape and cut around our small circle and medium circle. Our finished product should look like the picture below, or a miniature version of the black circle we created.
  Now, we must place the red circle over the large black circle and we must be sure to center the two small circles so they appear as one, like depicted in the picture below.
 What would our red record label be if it was blank? Here at WeeklyDT, we go the full distance. So, now we must decorate our record with some song titles. This can be accomplished by carefully cutting a piece of duct tape in half, like a hot dog bun, Then, by cutting small, long rectangular pieces, as seen in the picture below.
 When we finish placing all of our song titles, they should look somewhat like the picture below, but please feel free to install your own creativity into any aspect of this project!
 Now, we must cut a piece of tape, as shown in the picture below. Be sure the cuts are curved as opposed to straight. They should curve outward from the smallest point.
 When I originally placed my tape on the record, I felt that a shiny record label, in addition to a shiny record looked somewhat distasteful.
 Image from http://www.rpconline.com/catalog/content/images/tape_duct.jpg
 I do however wish to apologize for the fact that my schedule has become significantly cramped. So, I do apologize if WeeklyDT becomes slightly slower for the next couple of days. However, like the name says, there will be a new project AT LEAST once a week, so have no fear, we are here to stay.

Despite one winner, several other amazing outfits were created, such as Cinderella themed apparal. Again, check them out at the homepage for this scholarship as provided above.
If you are a high school student seeking financial aid, this is definitely the opportunity for you! If you aren't, it is extremely entertaining to look at all the finalist's productions.
 To initiate our project, we must first trace a regular bi-fold wallet. In the picture below, you will see two lines significantly close to each other. On a wallet, the outside is always slightly longer than the inside to compensate for folding radii. (plural of radius.) So, we must make two sheets of duct tape, but one must slightly exceed the other in length.


We are finally finished! Now go show this bad boy off to all your friends! Be sure to stay close for our revolutionary future lessons! See you soon.


Once our border is cut, we will remove the excess white tape. Our finished project should look like the picture below.
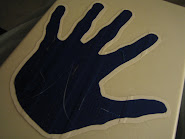
Congratulations! Your first duct tape handprint! But don't stop there! Keep it up! I want to see your variations and results!


